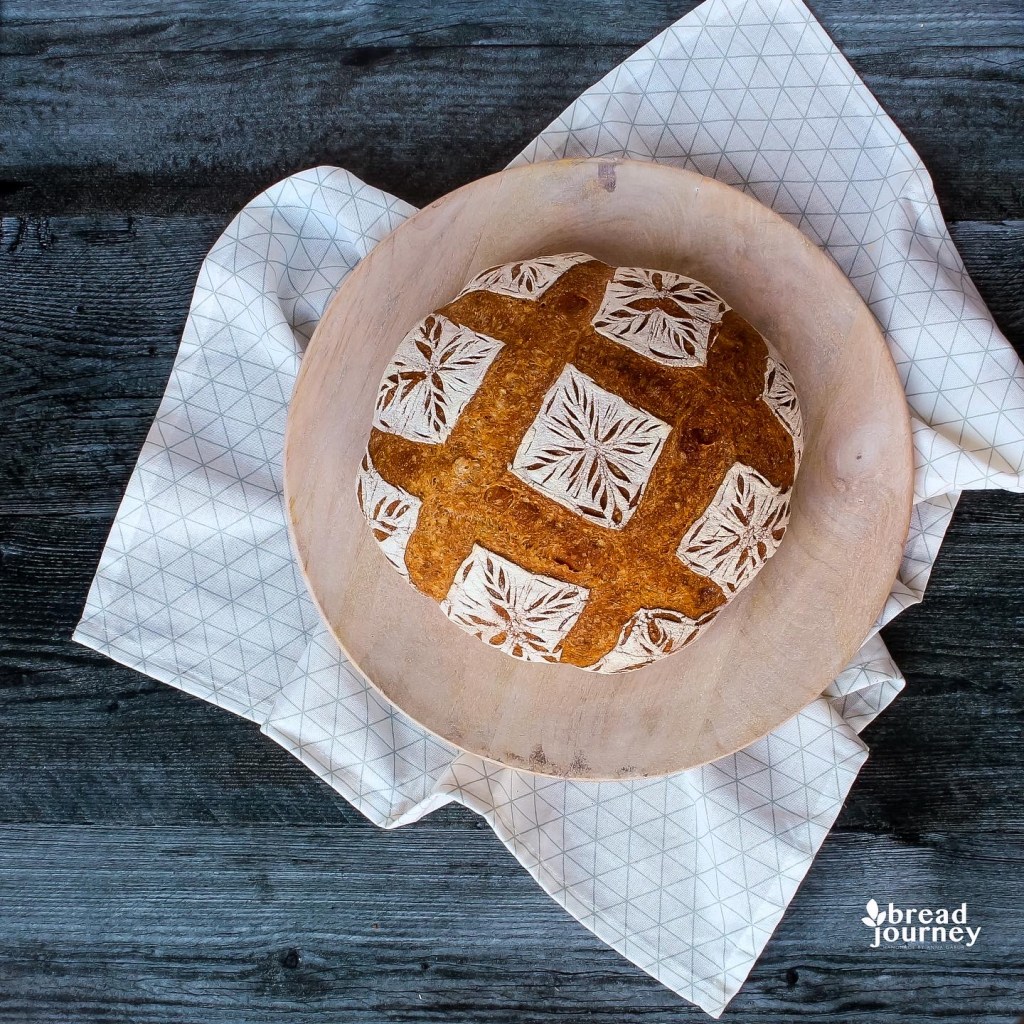
I promised to write a post or two on scoring and decided that before we get down to the nitty-gritty I would like to take you on a tour of my scoring philosophy and prep. I occasionally get puzzled questions as to why all this effort and fuss even matters. It’s just bread, no? Well… no. Not for me, it isn’t. For me bread is my haven away from work and I want to give love to every part and aspect of it.
Scoring does not save bad bread, but it can make good bread even better. You won’t just tear it up and wolf it down. You have to stop and take a moment to admire it, acknowledging the work and passion that has been put into it.
A baker who decides to embellish their bread like that will have to be attuned to temperature, fermentation and gluten development in new ways, taking the relationship to a new level. It also keeps the passion alive as you can’t get complacent and take baking for granted when your loaves are canvases of art yet unborn.
Are you convinced it’s worth a try? Let’s begin then, shall we?
Fermentation and shaping
Everything starts before the blade even touches the dough. While I am often asked what recipe I’m using, and I’ve even written my own here, I don’t believe flour makeup makes much of a difference. I’ve scored 100% wholegrain, mostly spelt, semolina, and all-white with equal success. Dough with high extensibility is better, so I advocate for some spelt in the mix. Aside from this the vital stages of fermentation and shaping are usual, except that it’s very important to do them well. Poorly fermented loaves with no proper surface tension will result in unclean cuts.
If you decide to tackle intricate scoring before you perfected fermentation and shaping, you will sprinkle plenty of tears on your bread. Make sure you count those in for hydration and salt!
Proofing
Proofing also requires your attention. Under-proofed dough will be unruly and unpredictable. Overproofed dough will collapse during scoring. Optimal proofing environment is long cold proof in a lined basket. Baneton circles might be pretty, but they get in the way of what you want your bread to look like. Linen also absorbs moisture, prepping bread surface, and it peels off safely without tearing surface even when dough gets stuck! Just mist the stuck place and pat it dry with a paper towel afterwards.

Tools
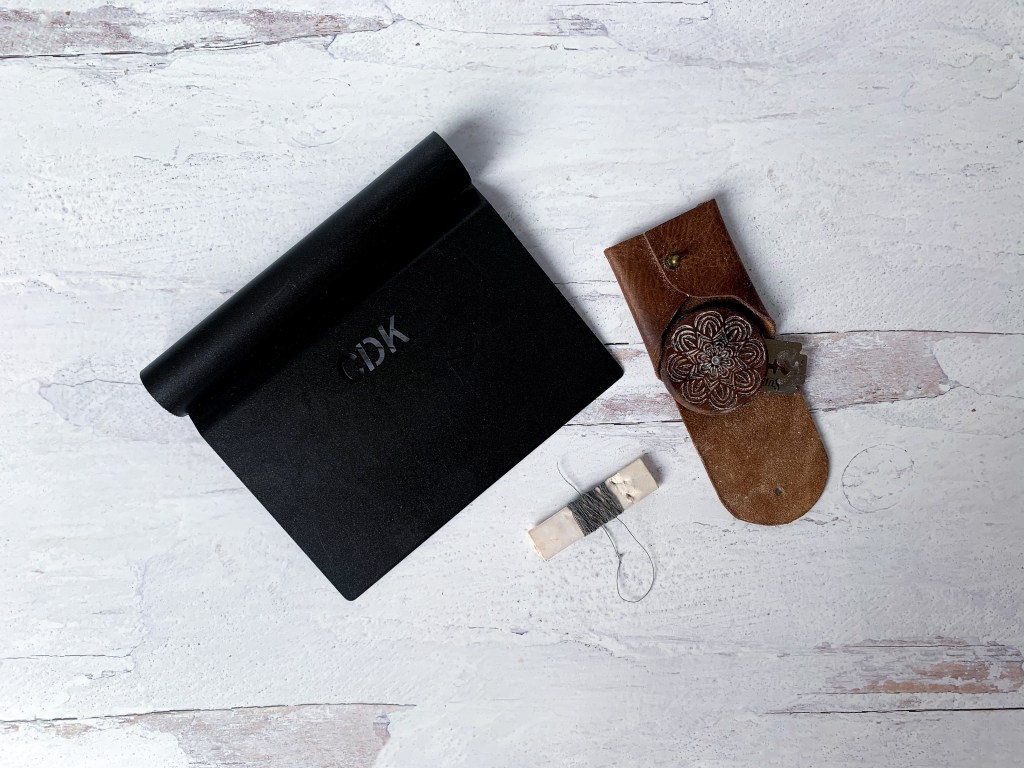
Sharp razor-blade. I cannot stress this enough. A simple razor-blade held in a deft hand is an often overlooked tool. I update my blade every 6 loaves or so and holding it in my hand allows me to maneuver it any way I want. I mount my blade on the fabulous UFO lame that you can get here.
Another tool that might sound unexpected to anyone who is not acquainted with my method is a spool of sewing thread. I use it to imprint guidelines that help maintain symmetry. This is a process in and of itself that I will discuss at length at in a future post. Until then you can see it in action in one of my youtube videos like this or this.

Faith and practice
You can do all the prep listed above, but if your hand is shaking, your lines will come out ragged and your bread will burst. Take a deep breath and let your wrist do the work. Cuts have to be deep and precise. If your dough is cold, this should be easy to achieve, so don’t worry. Given the fact that most patterns are made up of short strokes, it’s easier than it seems. If your cut is 2cm or shorter – you can’t possibly go too deep, so don’t be afraid to dig the corner of the blade into the dough. If this is your first lacy score, start with something simple, like radial wheat stalks.

Have faith in your dough as well. “What if it spreads out?” some ask. Well, it should! Allowing it to spread means that cuts will open up just enough to define them and it will distribute the oven spring across a greater surface, preventing cracking. Don’t be disheartened if what you slide into the oven looks like a pancake more than a boule. You’ll end up with bread to make you proud, I promise!
Steam
Every recipe and oven dictate their own baking temperature and time, but one undeniable component that needs to accompany your bread through the heat is steam. Plenty of it. A properly humid environment not only guarantees that your crust will be irresistibly caramelized, but it will also help avoid cracking. A moist crumb will be soft and pliable, expanding along with your loaf as scores open up.
Be forgiving
Planning your pattern is a big part and I will write more on how to do that, but no matter how carefully you go about that, things can still take an unexpected turn! I’ve had more than one loaf crack in odd places and overthrow all my plans and expectations. That happens! If your scores end up crooked or your loaf bursts, guess what that means? You have a reason to practice again! Love your loaves and they will love you back!
Keep on learning
And I’m here to help! I’ve even published my online course on scoring technique for free and you can access it here!

More to follow…

You are simply awesome. The way you share your knowledge on sourdough, even my 10yr old can understand that. You keep it very simple. That’s the reason I love to read all n everything written by you on ” perfect Sourdough”.
God bless you!
LikeLike
Thank you, Sonia! This is the kind of support and motivation I need to keep writing! It makes me happy to know that you like my blog.
LikeLike
Awesome! This is so wonderful! Thank you Anna.
LikeLike
Thank you, Michelle! I’m glad this was useful 😊
LikeLike
I tried winging it last night after seeing a pretty loaf of bread, and I realized I know nothing! 🙂 So today I started researching and I am very encouraged to try again after reading your post. Very inspiring work, thank you for sharing your love!
LikeLike
Thank you, Annie! I am so glad this was useful to you and I’m rooting for your breads ❤️ you have the last name for it! 😉
LikeLike
You are my muse!! Thanks to inspire me❤❤❤
LikeLike
I’m happy you find my work inspiring 😊
LikeLike
Looks beautiful!
LikeLike